Monday, February 2, 2015

Seeing Pink


Hey there kitty cats! The countdown begins.... 13 days until Valentine's Day. I myself am not much of a fan of V Day however.... I love all the fun clothes and candy hearts and what not. Oh and everything pink! I picked out some pretty little images to share with you all from my Pinterest board. Hopefully it will help inspire many fun Valentine's Day images of your own. 


Who doesn't love balloons.... especially pretty pink coral and colored ones!


I'm obsessed with fiber glass chairs and all things Mid Century... so of course I'm in love with this pretty pink one.


Pretty pink lips.... yes please!


Beautiful vintage books with pretty little book marks on display!


The loveliest shade of pink french doors opening up to the perfect veranda.


Who wouldn't love a baby blue princess phone paired with the prettiest rose patterned wall paper.

I must have died and gone to heaven.... I'm loving these tea cups and am wishing that these pretty and very sparkly dresses were in my closet. A little tulle and macarons make everything complete. 


Pink pearls....


The faintest hint of dusty pink.


Whimsical painted entry ways and pink chairs!


Raspberry jelly in my macarons..... delightful.


Last but not least.... more pink pastel balloons because balloons make everyone smile!

I hope everyone had a wonderful weekend and got to see Katy Perry's mesmerizing performance during the Super Bowl's halftime show.

Follow along with me on Pinterest!

Monday, January 26, 2015

That's so dope...


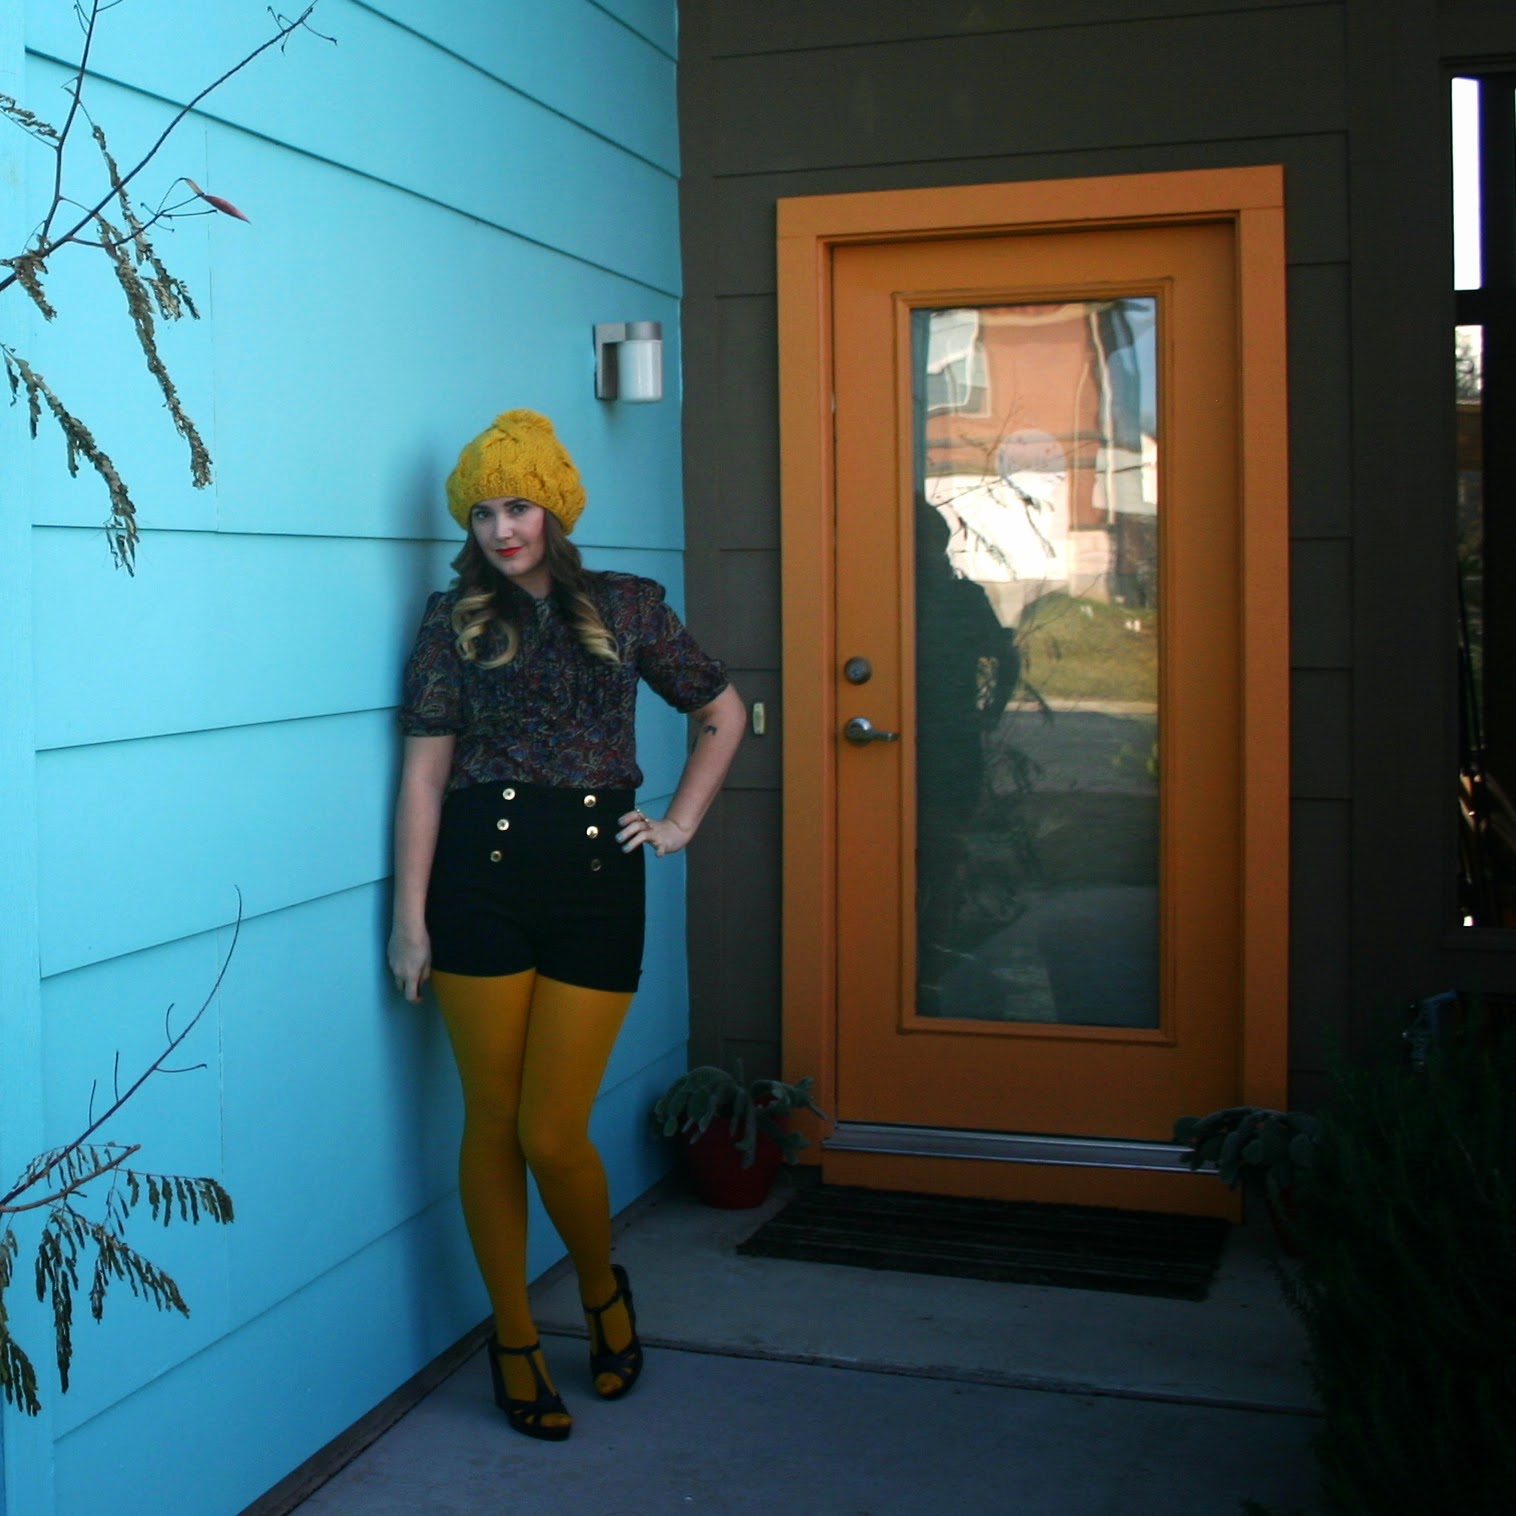
Happy Monday kittens! I'm obsessed with this new outfit combo I put together here. I discovered it looked good the other day and can't wait to mix it up with other colored tops and tights! I was pretty pleased with myself as you can see....


We had a gloomy and wet week but the sun has finally come out and I'm so happy. I really hate gloomy weather and live for the sun... seriously. All is well in the Hart household. The Mister and I visited some long lost friends this weekend. I say long lost friends because we haven't seen them in nearly 9 months or so. A lot has happened since then and it was great to catch up. They have the most adorable baby girl Lily Rose that we got to meet and hold most of the night. She was such a sweet and very easy going little nugget of love. 


It's a new work week and I'm all ready and raring to go! I have a whole list of things that I need to accomplish this week but it's all good because quite honestly work for me doesn't even feel like work. I love that I get to stay home with the puppies and crochet all day. I'm so blessed that my Husband is able to let me have that choice. I'm also thrilled that I get to devote my morning to working out and actually being able to take some time for me is very important. I can't say that I love working out or jogging but I love the way I feel afterwards and I love seeing the results. I've come along way since last year...


I cannot wait for Spring and Summer to come... I'm getting very excited planning all the little trips and adventures that The Mister and I are going to have. I'm dreaming about Port Aransas in the Summer...  laying out on the beach with the puppies and soaking up the sun. We always have so much fun when we go out there. I also want to start hiking more again and really want to try out paddle boarding. I also hope to make it out to Wimberley and Fredericksburg this year as well.


My little crochet business is doing well. I'm continuing to get orders on Etsy even after the New Year (which is usually the slow period) but I'm staying busy filling orders and keeping my stores all stocked. I'm also trying to work on my book proposal on the side when I'm not busy. It's so hard to write about yourself and try to sell yourself and your vision but I'm hoping this will help me develop and grow as a person. It's scary but I suppose everything is a little frightening if you've never done it before. 


I'm obsessed with this matte lipstick that I purchased last Summer. I forgot all about it and then re-discovered it again. It's Wet & Wild and is the most awesome shade of orange. I know, I know.... 
Wet & Wild you say..... but I love that it's highly pigmented and the price is right and the big seller is that they are cruelty free. That's very important to me. I'm also all about NYX as well.... I love their matte finish lipstick too. I'm so much more into makeup than I used to be... I wish I had discovered how to apply it back in the day... better late than never I suppose.


Let's talk about these awesome little sailor shorts that I found last Summer at Wet Seal. I simpley adore them... they were cheap and stretchy and the cool thing about them is I can also wear them as bathing suit trunks. How cute would that be with a little bikini top. They fit way better than they did last Summer and I'm so exited to wear this "little get up"in the Summer (without the tights of course). 


I don't get to play dress up all that much anymore because I work from home now and normally just wear jeans and a tee but still love to have fun experimenting on the weekends. Speaking of weekends.... I totally forgot to mention that I also got to hang out with my Sister and Brother in law on Saturday night. It was so much fun... I always have fun with them and their adorable kids Ben and Max. I just love my little Nephews and now they are st the most fun ages where we can have silly conversations with them. We ended up cooking out and watching "Guardians of the Galaxy" together.... which I hadn't seen before. It was really cute.


It was a great weekend indeed. Here's to a pleasant work week and hopefully it will pass rather quickly so that we can all look forward to Friday! 

xoxo

Top: Forever 21
Shorts: Wet Seal
Tights: Target
Hat: Mod Cloth
Shoes: Macy's 
Lipstick: Wet & Wild

Wednesday, January 21, 2015

The Good Hippie


My good friend Bri of The Good Hippie has the most amazing handmade skin care line that is vegan and all natural. Bri is even launching a line of products specifically for children called 
The Little Hippie. I've had the pleasure of getting to know Bri and her amazing family over the last few years and have also traveled and participated in many shows together. Not only is Bri my dear friend but I am truly obsessed with her beautiful products.  


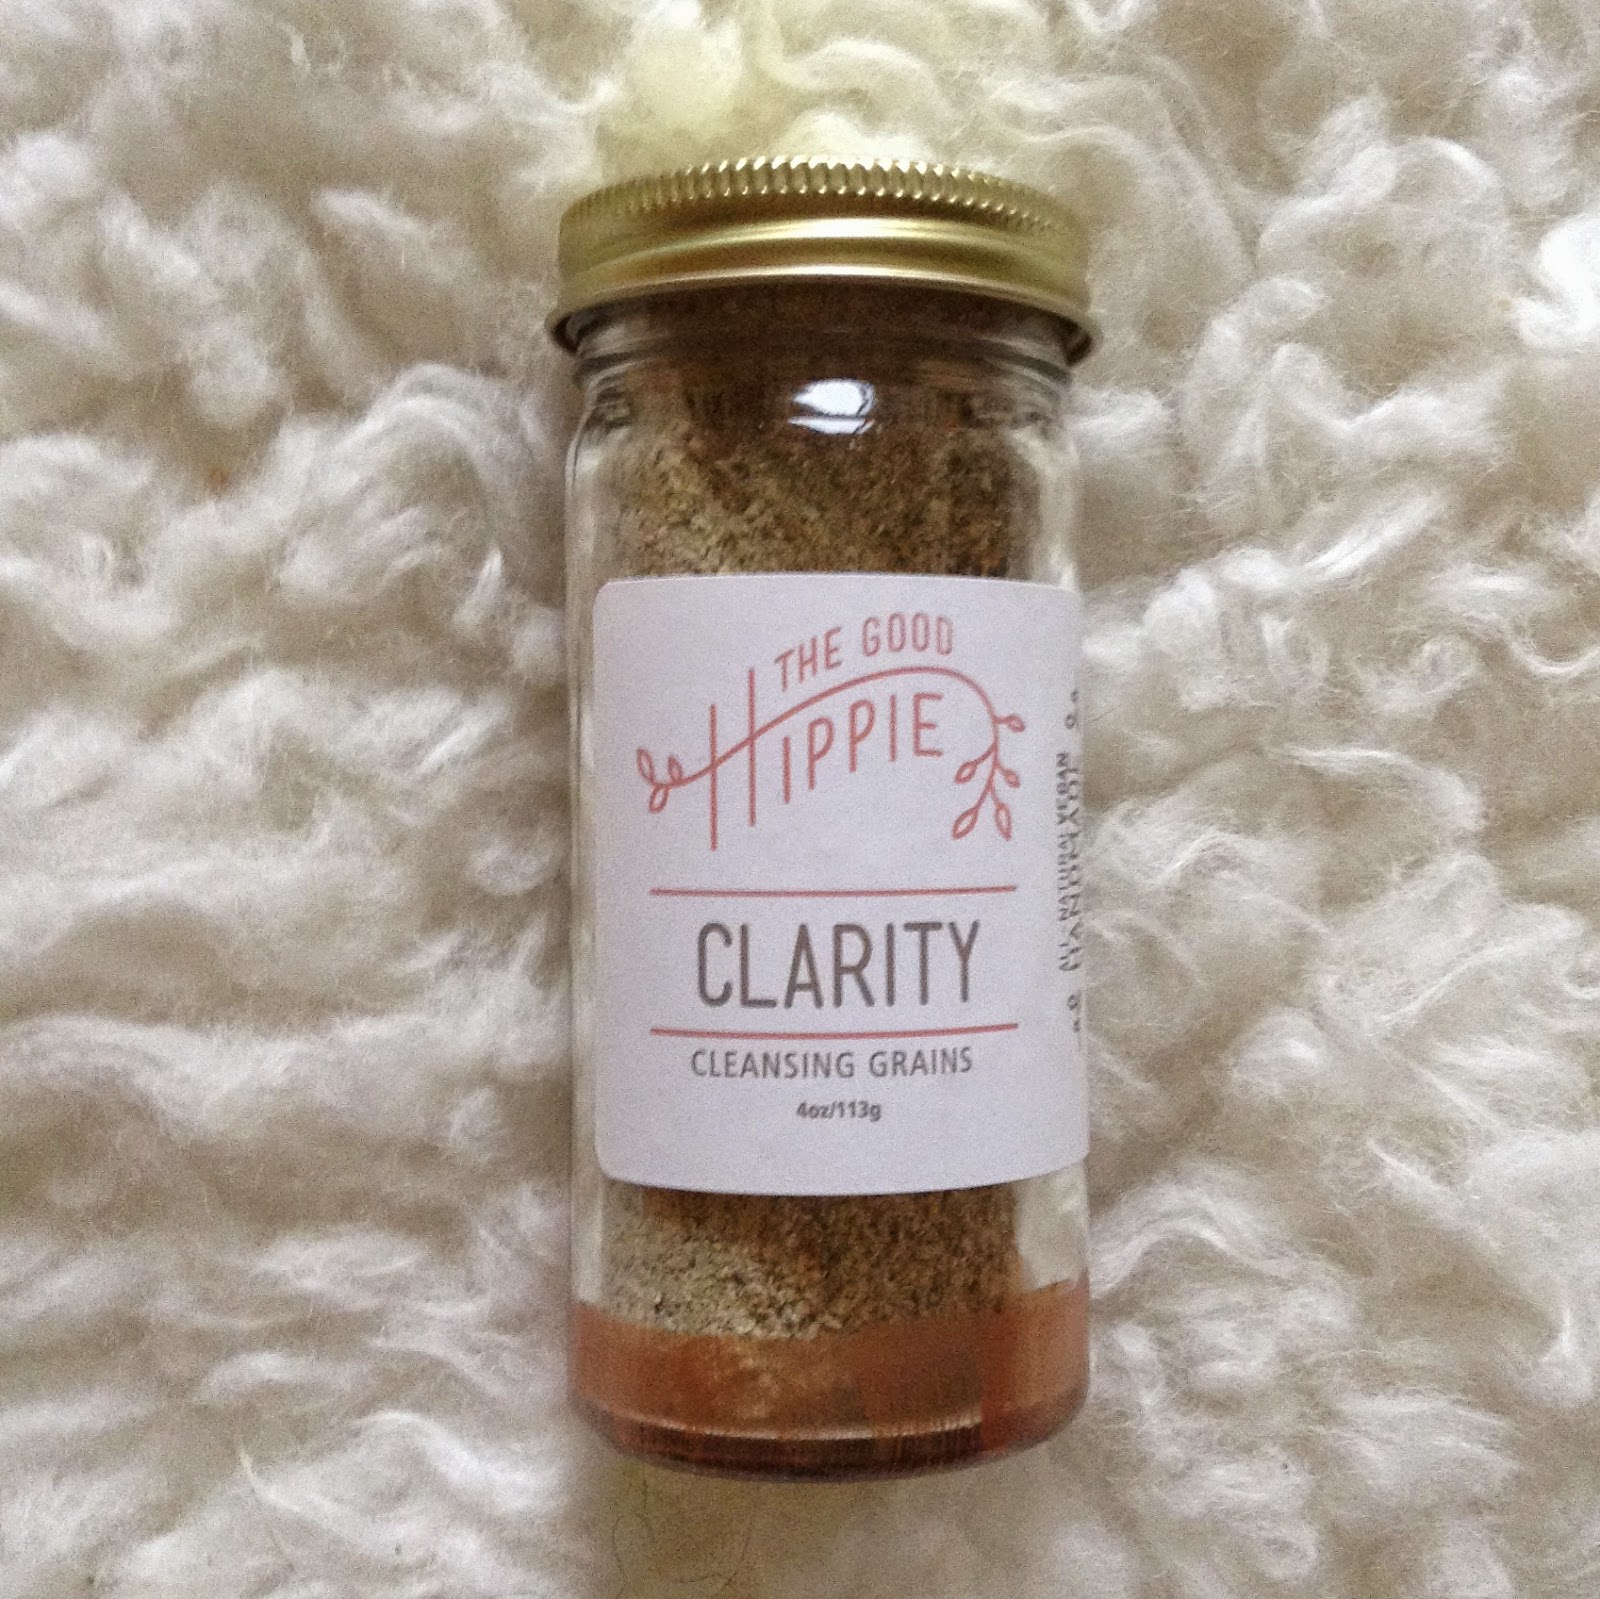
If you're like me and tend to have "problem skin".... which is a nice way of saying you have the occasional blemish, than clarity is the line that would most likely be for you. I'm all about Bri's toner... I literally use it every night after I wash my face and right before I go to bed. It's so clean and refreshing, it leaves your skin super clean without stripping your face of all your oils. Which is great because you don't want to have really dry, flakey skin. 


I keep my little scrub bottle in the shower. I use it after I wash my face with a gentle cleanser. It's great to exfoliate and the ground up herbs smell soooo good!


Remember how fun it was when you were a teenager and used to give you and your girlfriends facials during sleepovers? Every time I apply a facial mask I transform back into a fourteen year old girl. I put on my mask, make some hot tea and grab a "trash magazine" to read as I paint my fingernails. Just sayin'. I love to wear my mask while I'm indulging in my favorite guilty pleasure..... like watching a TV show that the Mister would never want me to watch. Ha ha! 


 I keep the cleansing grains in the shower too. At first it's kinda weird to use a product that doesn't have a lather.... but you get used to it.  I just love the cleansing grains. Speaking about love.... I'm really falling hard for Bri's beautiful packaging. Nobody wants to have plastic bottles laying around the bathroom. I keep mine out on full display. I also love the fact that they are hand painted and you can keep the bottles and re-purpose them. Bri does everything by hand with tender love and care.


It's Sophie approved! Just look at her gorgeous packaging! You can buy these products individually or buy the whole skincare line and it comes shipped to you like this.


I also wanted to add a little something about the peace spray.... I've been using it for over 2 years now and absolutely love it! I use it just before I go to bed every night.....it's literally on my nightstand. I spray a few puffs over my head and face and even my pillow. It's so calming and soothing, it really helps me un-wind from a hectic day. It's become my bedtime ritual.

I don't advertise or promote products that I truly don't believe in. I don't like to use anything that is 
unnatural or that is tested on animals. I also would rather pay a little bit more for a product that I know is hand made (rather than a factory) and have that money go directly into the pocket of the maker themselves. I can't stress enough how important it is to support the makers and crafters of the world. Being a small business owner myself I know how important it is to support local vendors, helping  create a strong sense of community as well as stimulating economic growth.

See The Good Hippie's list of other links below...


xoxo


Monday, January 19, 2015

One less problem...


Happy Monday kittens! I'm keeping this blog post rather short today.... as I have a ton on my mind lately. This is kinda of an older photo shoot I did a few weeks back and never got around to publishing it till now. I love this shirt that I purchased from Forever 21. It pretty much sums up how I feel about life right now in general... I've been super stressed out and emotional these last few days and haven't really been able to really "keep it together". 


I have some more recent health issue that have popped up. To be honest, I'm just completely sick of being sick. I felt like I was finally at a point in my life where I was feeling good and had no real concerns with my physical health.... in fact the last year I've devoted a lot of my time to getting back into shape physically and mentally. I hate being the victim and never try to act helpless or ever ask "why me?" because that's just a waste of time but I literally feel like I've been defeated. I get up just to get knocked down again and again and I'm getting really tired of it.  


I don't want to be a "Debbie Downer" ... so I'll say nothing more of that subject. In other news, I've been crazy busy with doing research and writing a book proposal and even a marketing plan 
(which is pretty stressful). I don't even know where to begin some days.... I also have a bunch of orders on Etsy right now. Whew! 


Molly (our chicken) is getting better and literally had to learn to walk again. She is still hobbling around but I'm sure she'll get it right soon. For those of you that don't know... our chicken Molly got her claw caught in between two boards on our deck and snapped her little claw off. Well, they removed her claw at the vet and now she is left with a little stump and her claw will never come back. She's a little off balance right now... it's kinda cute. I've never spent so much on a chicken before! I can't believe how much the vet charged us to remove and clean her up. I also had to take her back on three separate occasions to have them check it out and re-wrap it each time. We also had to give her pain meds and antibiotics (which is pretty hard to give a chicken).


Then this morning I got up to get ready for a very important doctors appointment and feed the dogs and was sitting them on the couch (checking my e-mail) and went to give Lucy a kiss because she looked so cute and she bit my nose... like really hard. I'm literally on edge and can't handle to most simple of tasks or situations right now so after she bit me I ran upstairs and cried. 


In happier news I got to hang out with some old friends I haven't seen in almost a year last night. My really cool buddies Pip and Supana had us over for Dinner and to meet their adorable new daughter Saya. I say new because I've never seen her or met her before... she is about 8 months old and is literally one of the cutest babies I've ever seen. She has the most gorgeous jet black full head of hair! It's long.... like you can put her hair in little piggy tails already and she's only 8 months old. She is just a doll and it was so good to catch up with them. 


I plan on keeping things low key throughout this work week and into the weekend. I've gotta try to manage my stress as best as I can by jogging and eating right. I don't want any seizures to start creepin' in on me again. I've got a lot on my plate right now and need to stay focused and keep my eye on the prize.


Hope all you kittens had a wonderful weekend. I'll be crocheting my little heart away while I watch some Hulu and Netflix. Weeeee!

xoxo

Shirt: Forever 21
Cardi: Target
Jeans: Old Navy
Shoes: Target
Hat: Amazon

Thursday, January 15, 2015

Egg magnet Brooch & headband pattern...


These are the materials that you will need for this project...


  1. yarn (white and yellow)
  2. polyfill
  3. hot glue gun 
  4. felt in white or cream color (one sheet will do for this project)
  5. floss in a pink or red tone (if you want to make the face)
  6. magnets (the heavier duty kind)
  7. crochet hook 4.0 
  8. plastic doll eyes (if you want to make the face)
  9. Darning needle
  10. crochet marker
  11. (not shown in image) thin metal headband


Starting with the yellow yarn for the yolk working in the "magic circle".
 Chain 2

Row 1: 6 sc into the 1st chain from hook.

Pull circle closed tight.

Row 2: *2sc into each sc* = 12 sc.

Place stitch marker in last sc (the one on the crochet hook).

Row 3: *1 sc in first sc, 2 sc in the second* repeat around. = 18 sc.


Remove stitch marker and place it back on the last chain on the hook.

Row 4: *1 sc in each first two sc, two sc in 3rd sc.* Repeat around. = 24 sc.

We are all done increasing our rounds!

Row 5-7. Sc in each sc all around. = 24 sc.

By now your yolk should look fully developed. Slip stitch into next sc and pull yarn through leaving a long tail left over.


 If you want to take your egg brooch to the next level of cuteness then follow along to see how. If you want your egg to be "sunny side up" then skip this step.

Making the face on your yolk.

For this step you'll need a set of plastic eyes with the backings, pink colored floss of your choice, scissors and a darning needle. All these items can most likely be purchased at your local craft store. I purchased all my supplies at Hobby Lobby. See list of resources, including links at the end of the post.


Step 1: Place the plastic doll eyes in yolk as close or as far apart as you like. I prefer mine to be closer together like so:

Step 2: Snap the backings onto the reverse side of yolk making them secure.

Step 3: Cut a piece of floss about 6-7 inches long and (using your darning needle) sew a little "V" as a smile into the yolk like so:

Tip: Don't forget to tie a knot at the end of your floss! Finish by tying and cutting off the remaining floss. Set aside.

Now it's time to get started on your egg white!

Using white yarn, chain 2.

Row 1: 6 sc into 1st chain. Once again we are working "the magic circle". Pull hole shut tight.

Row 2: *2 sc in each sc* all around = 12sc.

Mark the last sc on your hook with a stitch marker.

Row 3: *1 sc in first two sc, 2sc into third sc.* Repeat around. = 18 sc.

Are you starting to notice a pattern? After each row you should have 6 more stitches.

Row 4: *1 sc in first 3 sc, 2 sc into 4th.* Repeat. = 24 sc.

Tip: Keep your tension super tight... this is key for making these little guys. If you are a beginner don't worry, practice makes perfect!

Row 5: *1 sc in first 4 sc, 2 sc into 5th sc*. Repeat around. = 30 sc.

Row 6: *1sc in first 5 sc, 2 sc into 6th sc*. Repeat. =36 sc.

Row 7: Sc in every sc all around. = 36 sc. Slip stitch into next sc and tie off leaving a little tail to weave into the backside of your egg white. Use your darning needle for this step and don't be overly concerned what the back of your egg white looks like as it will be covered by felt in the end.


Tip: Don't have your tension super tight for this step. Make it a tad loosey goosey so that your egg white doesn't start to curl under on you!

Now comes the fun part! Now it's time to stuff your egg yolk. Using polyfill, stuff egg yolk part way. Using your darning needle you are going to sew the egg yolk onto the egg white. Don't worry if you mess up, you can always take out the stitching and re-do it.


Tip: I think it's adorable to place the yolk just a tad off center. Feel free to place the yolk right in the middle though. Once you get 3/4 of the way done with your stitching stuff the remainder of your polyfill into the yolk to make him extra fluffy!

Once you are all finished sewing on your yolk and tying it off, go ahead and cut the remaining yarn short. Now it's time to decide if you want a magnet brooch or headband. Get your glue gun all hot and ready to go! 

To make a magnet for your fridge or magnet brooch. If you're like me, I hate pinning brooches through the fabric of my nice sweaters and shirts. Instead make a magnet brooch! You need two magnets for this. If you're making a magnet for your fridge you'll only need one magnet. 

Step 1: Hot glue one magnet directly onto the back of your egg white. Make sure the magnets are both facing on the sides that are "attracted" to each other. That's pretty important.


Step 2: Hot glue the entire back side of the yolk down onto the felt. I'm using white felt but you can use cream colored as well. Anything that won't show through the white yarn is good.


Tip: Make sure you hot glue to the very edge of your crochet work. It's totally okay if some hot glue squishes out. You'll be cutting around the egg anyhow.

Step 3: Using sharp scissors cut around as close as you can to your crochet eggy making sure you don't actually cut into your crochet work! That would be a bummer. You're going to cut all the way around you egg so that the felt comes completely loose. Voila! Now you have an egg magnet. For the brooch just take the extra magnet and place it on the inside of your shirt so your brooch won't slip or come off.  You can even put it on a hat as a crazy cute accent! There you have it.


For questions please e-mail me directly. I'd love to hear your comments as well. Check out my resources below.

Just look how cute the finished product is!!! You can even add it to your favorite hat!


To make the headband you skip the step where you hot glue the magnet to the back and simply hot glue the back of the felt directly on to the little metal portion of the headband 
(it's cute to do it off to the side) and then cut out another circle of felt roughly the same size 
(or a tad smaller) of felt and hot glue that peice of felt to the back side of the egg so it secures the egg onto the headband. 

Here's what the headband looks like!


I purchased all my products at Hobby Lobby but you can find some of the supplies at Michaels and JoAnn's. 
I love this yarn (medium 4, acrylic) in white and yellow.
Floss (sold individually in store)